4 Practical Tools to Streamline Lesson Planning The more organised I am the more I…
Getting Started with Evernote for Music Teachers
Getting Started with Evernote for Music Teachers
I love Evernote! It’s such a great organising tool, especially for music teachers. It’s become like my brain in digital format and made my studio (and life!) so much more organised. Getting started with Evernote can seem a bit confusing, so here are a few tips:
Use Tags, Not Notebooks
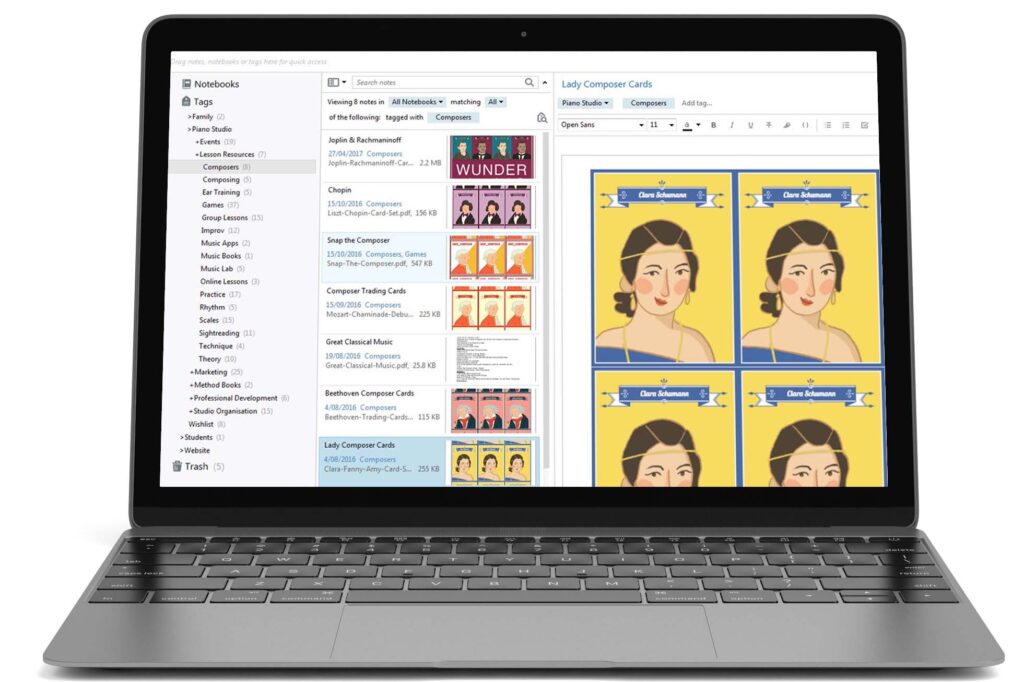
This advice changed how I was trying to use Evernote, and has been the secret to turning it into one of my favourite tools. It’s possible to nest tags (so under your “Scales” tag you could have tags for “Major Scales”, “Minor Scales” and “Arpeggios”) and each note can have multiple tags (for example when saving this article I tagged it with “Scales”, “Books”, “Worksheets” and “Apps”). Now I have my filing system for notes sorted and it’s so easy to find what I’m after.
Start Small
Evernote has so much potential that it’s easy to feel overwhelmed. My best advice is to start small and as you become more familiar you’ll find yourself using it more and more. Reading your favourite blogs? Save any relevant articles. Have a great idea for your next recital? Create a new note and write it down. See a great music book at the library? Take a photo on your phone and save it to your “Wishlist” tag. Before you know it you’ll be using Evernote for everything!
Try It!
The best way to find out if Evernote will help you get more organised is to just give it a go! Sign up with the free account, set up some tags, and make a point of using it for a month. By that time you’ll have a pretty good idea of how it’ll work for you and you might just have found your new organising BFF.

Ready to get more organised? Follow these simple steps for getting started with Evernote for music teachers:
1. Sign up for a Free Evernote Account
If you want to see if Evernote will work for you, then the Basic Account will have everything you need to get started. Plus it’s free! You can upgrade anytime you want to.
2. Install Evernote
The limitation of the free account means that you can only install Evernote on two of your devices. Pick the two that make most sense for you. If you’re installing on your computer, then install the Web Clipper too.
3. Set up a Students Tag
Click on the “+” sign next to “Tags” and add your first tag called “Students”. Right click on the Students tag and select Create Tag in “Students” and create one tag for each of your students.
Now every time you come across an activity, piece, or resource that would be perfect for a particular student (or students), you can save it to Evernote and tag them. Next time you’re lesson planning you can check out each students’ tag for ideas.
4. Set up a Resources Tag
Following the instructions above, add another tag called “Resources”. Then create nested tags for the different types of resources you use in your studio. The tags I’ve included under Resources are:
- Apps
- Composers
- Composing
- Ear Training
- Games
- Group Lessons
- Improvising
- Labs
- Music Books
- Online Lessons
- Practice
- Rhythm
- Scales
- Sight Reading
- Technique
- Theory
Add any of these tags which make sense for you, plus any others that you need. It’s really easy to rename, reorder and delete tags, so don’t worry about making a mistake!
5. Start Saving and Creating Notes!
You can now start saving PDFs, web pages, screenshots, Google Docs, and images. You can also create new notes right in Evernote which can include text, tables, images, audio, and lists with checkboxes (my personal favourite!).
Once you’ve got the hang of using Evernote you can start adding different tags and exploring all the extra features.


